Makes a batch of 40
Along with my love for crocheting and doing crafts, I love to bake! I especially love to make cake pops! Everyone asks for my recipe and so I finally decided to post it. Let me warn you, they are time consuming. Most times I make them, I'm doing lots of other things at the same time and they can take up to 4 hours. But they are well worth the effort! If I get a positive response to this recipe/tutorial, I have many other baking recipes I would love to share. Let me know what you think! Thanks for stopping by Sadie's Basket.
Ingredients:
-Betty Crocker Cake Box
-Betty Crocker Frosting (NOT the whipped frosting!)
-Eggs, oil, and water according to cake box
-1 pk of Wilton 4 inch lollipop sticks (40 sticks)
-1 pk of Wilton 6x4 clear plastic treat bags (40 bags)
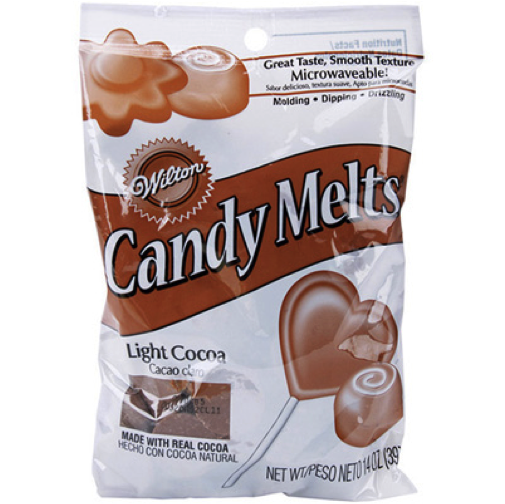
-2 bags of Wilton candy melts
-1 extra bag of Wilton candy melts if you want to decorate
the cake pops in another color
-Sprinkles
-Colored ribbon
Wilton candy melts are available at Michael’s, Joann, or
Walmart
Supplies:
-13x9 baking dish
-Parchment or wax paper
-2 cookie sheets
-1 cookie dough scooper
-Microwave safe melting bowl
Baking your Cake:
I
use Betty Crocker cake mix to make my cakes. I follow the directions on the box
and bake it in a 13x9 glass dish.
After it’s baked, I set the cake and glass dish on a cooling
rack and take a knife and cut slices in the cake making a checkerboard to let
the heat out. You need the cake to be completely cool.
Making your Cake Balls:
I dump the completely cooled cake in a very large bowl and
crumble it into tiny pieces with my hands. I add about ¾ of a container of
Betty Crocker frosting to the cake crumbles and mix it completely.
I use a cookie dough scoop that makes about 1 ½ inch uniform balls (make sure to pack the mix in). I place them on a cookie sheet on a piece of parchment or wax paper. I fit about 20 on a sheet. The batch should make around 40 balls give or take. I then place them in the freezer for at least 30 minutes. You just want the balls frozen.
Putting
in the sticks:
I
melt about ¼ of the bag of candy melts just for dipping the sticks. I use a
Pampered Chef microwave steamer to melt the chips but you can also melt them in
a bowl. I recommend melting for 1 minute, stirring the melts, and then 15 second
increments until melted (It should only take around 1 minute or 1 minute, 15
seconds).
Then I take one tray out at a time and dip the sticks in chocolate about an inch deep then stick in the center of the cake pops and back into the freezer for another 30 min or so until the chocolate is frozen.
NOTE: THIS TECHNIQUE MAKES THE CAKE POPS FLAT ON ONE SIDE. I ONLY MAKE MY CAKE POPS THIS WAY BECAUSE THEY REQUIRE SO MUCH TIME AND EFFORT. IF YOU WANTED COMPLETELY ROUND CAKE POPS YOU CAN ROLL THEM FOR SHAPE AND THEN PUT THE STICKS IN A STYROFOAM BLOCK THAT YOU CAN BUY AT A CRAFT STORE. I’VE ALSO HEARD OF PEOPLE PUTTING THEM IN AN UPSIDE DOWN COLANDER.
Dipping your Cake Pops:
When dipping the cake pops by myself, I only take about 5 out of the freezer at a time so they stay the coldest possible. The key is to have a very cold cake pop with the warm chocolate and that makes the smoothest shell. I melt ½ a bag of candy melts at a time. This should dip around 9-10 cake pops. So you are doing this in 4 batches. I once melted the whole bag of candy melts at one time and it made a thicker coat and actually coated less cake pops. So the ½ method stretches the candy melts.
I dip the cake pops in a circular motion and tap the stick
on the side of the bowl to get off excess chocolate. (This will save you more).
I then place the dipped cake pops on parchment paper on the counter and leave
there to harden.
Decorating your Cake Pops:
You can choose to put sprinkles on your cake pops while the chocolate is still wet (immediately after dipping). Or you can drizzle a different colored candy melt across the top after all cake pops have been dipped.
Packaging your Cake Pops:
You must wait until your cake pops have come to room temperature. If they are cold when you put them in the bags, they will produce condensation and moisture inside the bag.
I then put them in their plastic bags and tie with colorful ribbon!
Flavor Combinations:
-Chocolate
cake and chocolate frosting
-Lemon cake and cream cheese frosting
-Vanilla cake and vanilla frosting
-Vanilla cake with a couple drops of mint extract and
vanilla frosting (crème de menthe)
-German chocolate cake and coconut frosting
-Strawberry cake with vanilla or strawberry frosting
-Spice cake with cream cheese frosting
-Don’t forget you can always color the frosting of
vanilla cake batters with die to match or for fun holidays!
-I
have made cake pops with white, red, and even purple colored candy melts. I
have found that the colored candy melts don’t melt as thin and are harder to
dip. They make more of a chunky, thick candy coating rather than a smooth
coating that the chocolate makes. Enjoy!
I'd love to hear feedback, so leave any questions and comments below!
I'd love to hear feedback, so leave any questions and comments below!


